How to create Google Service key and verify with Indexly
Create Google Service Account API key in Google Cloud Console and Verify it for indexing in Indexly.

The Google Cloud Console has a limit of 200 pages per project (per service account). However, depending on your website's total number of pages, you can create multiple Google Service keys to increase the indexing limits. Indexly has various pricing plans to cater to up to 3X service accounts.
E.g., If you need to index a maximum of 600 pages per day, you will need to use 3 projects and 3 Google Service keys to enable us to index your pages faster. This is available in Indexly Agency Plan.
(1) Add your site to the Google Search Console
Before creating a Google Service key in Google Cloud Console, verify if your site is linked to Google Search Console. Below is the step-by-step process to connect your site to Google Search Console.

Once the above step is done, Getting an API key is quite simple. To avoid getting lost with multiple settings, we have created a step-by-step guide with screenshots.
(2) Step-by-step instructions on creating Google Service Key
- Log in to Google Cloud Console.
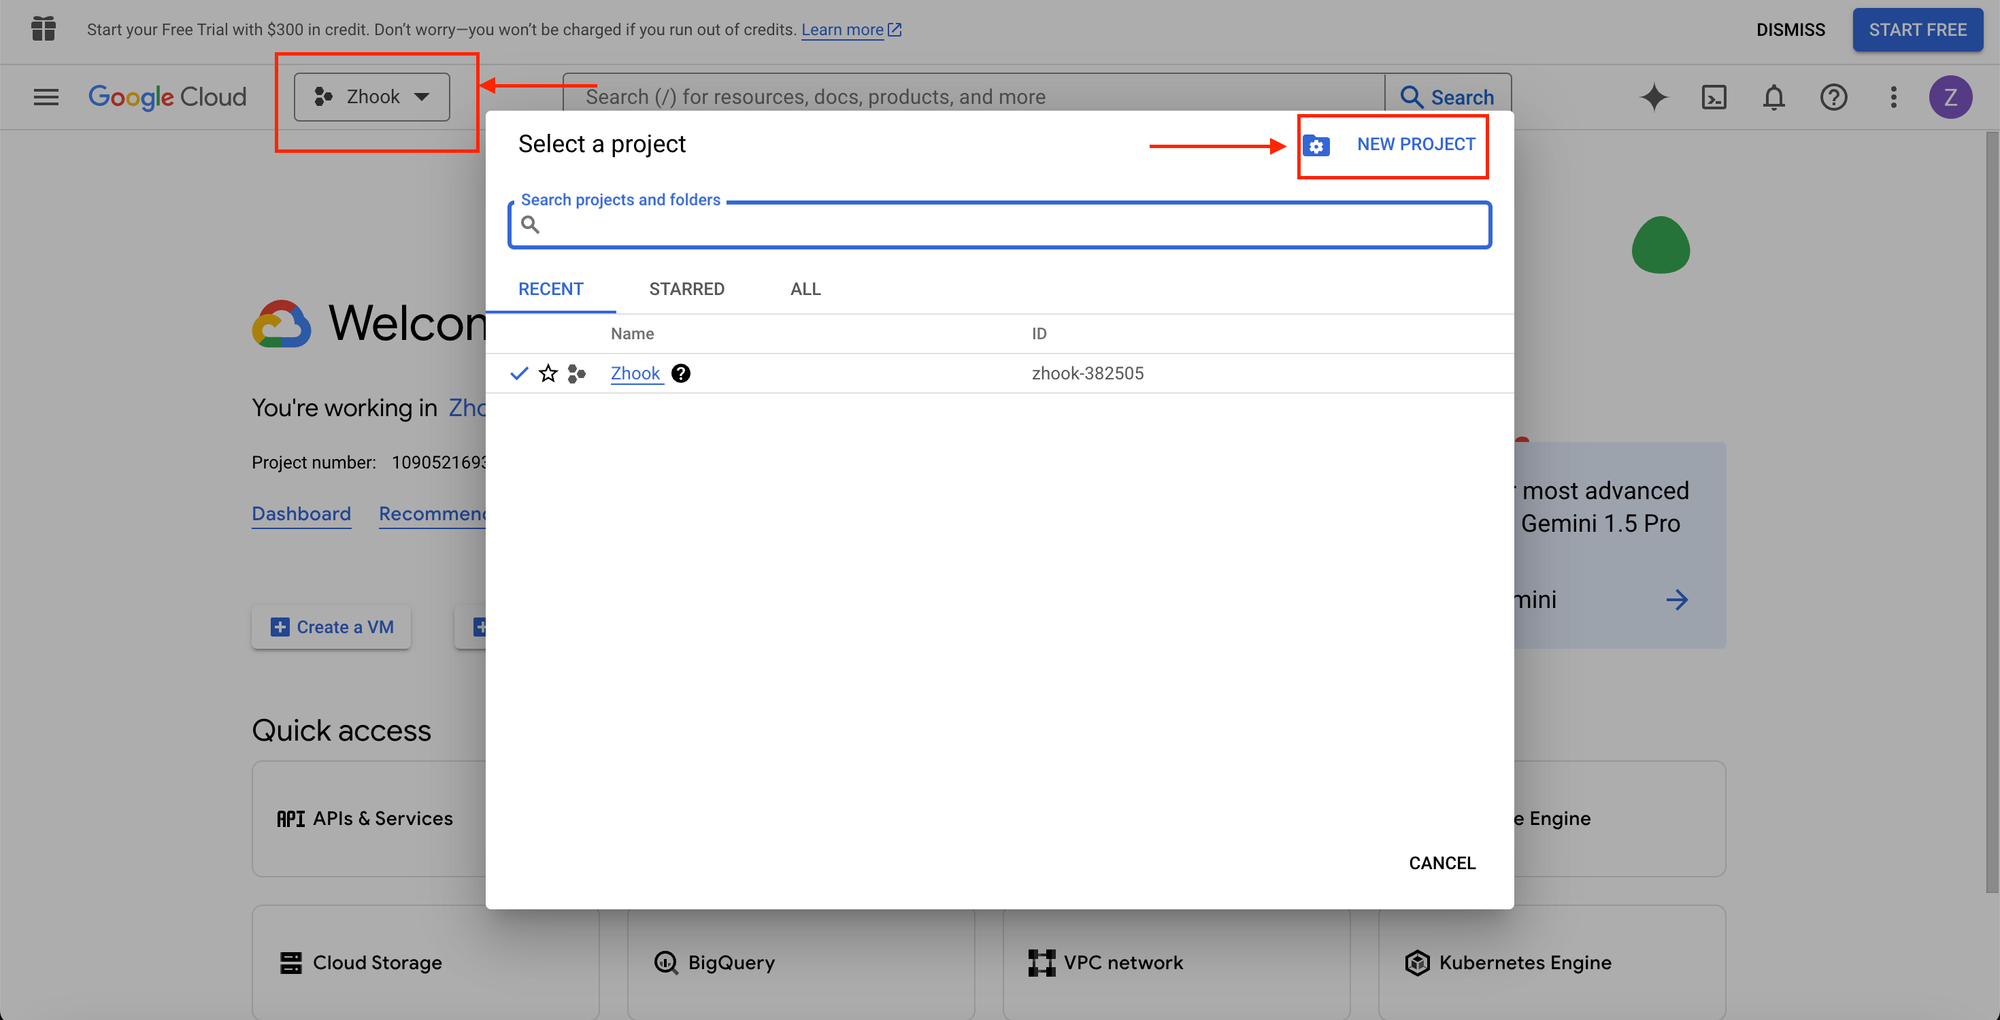
- Select an existing project or create a new project.
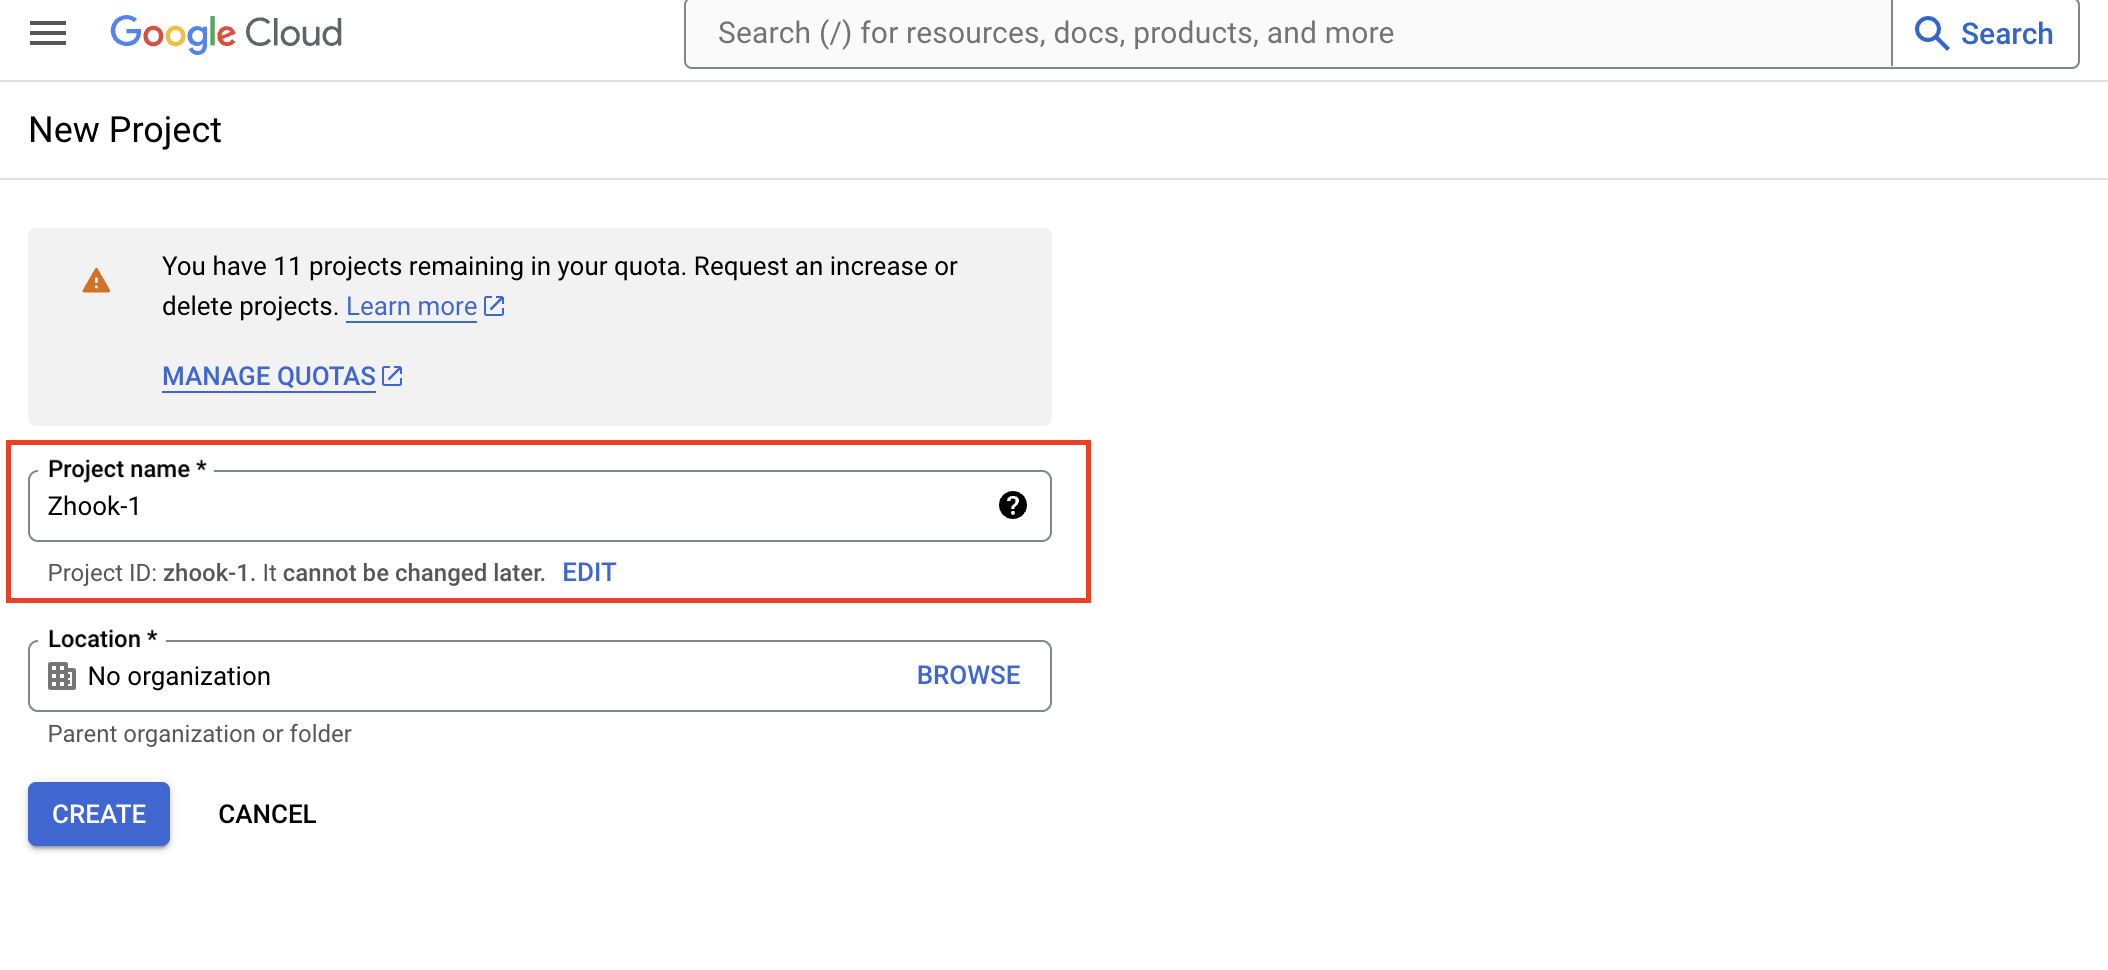
- To create a project, enter its name (for example, the name of your site). You can leave "No organization" in the Location field if you don't have a Google company.
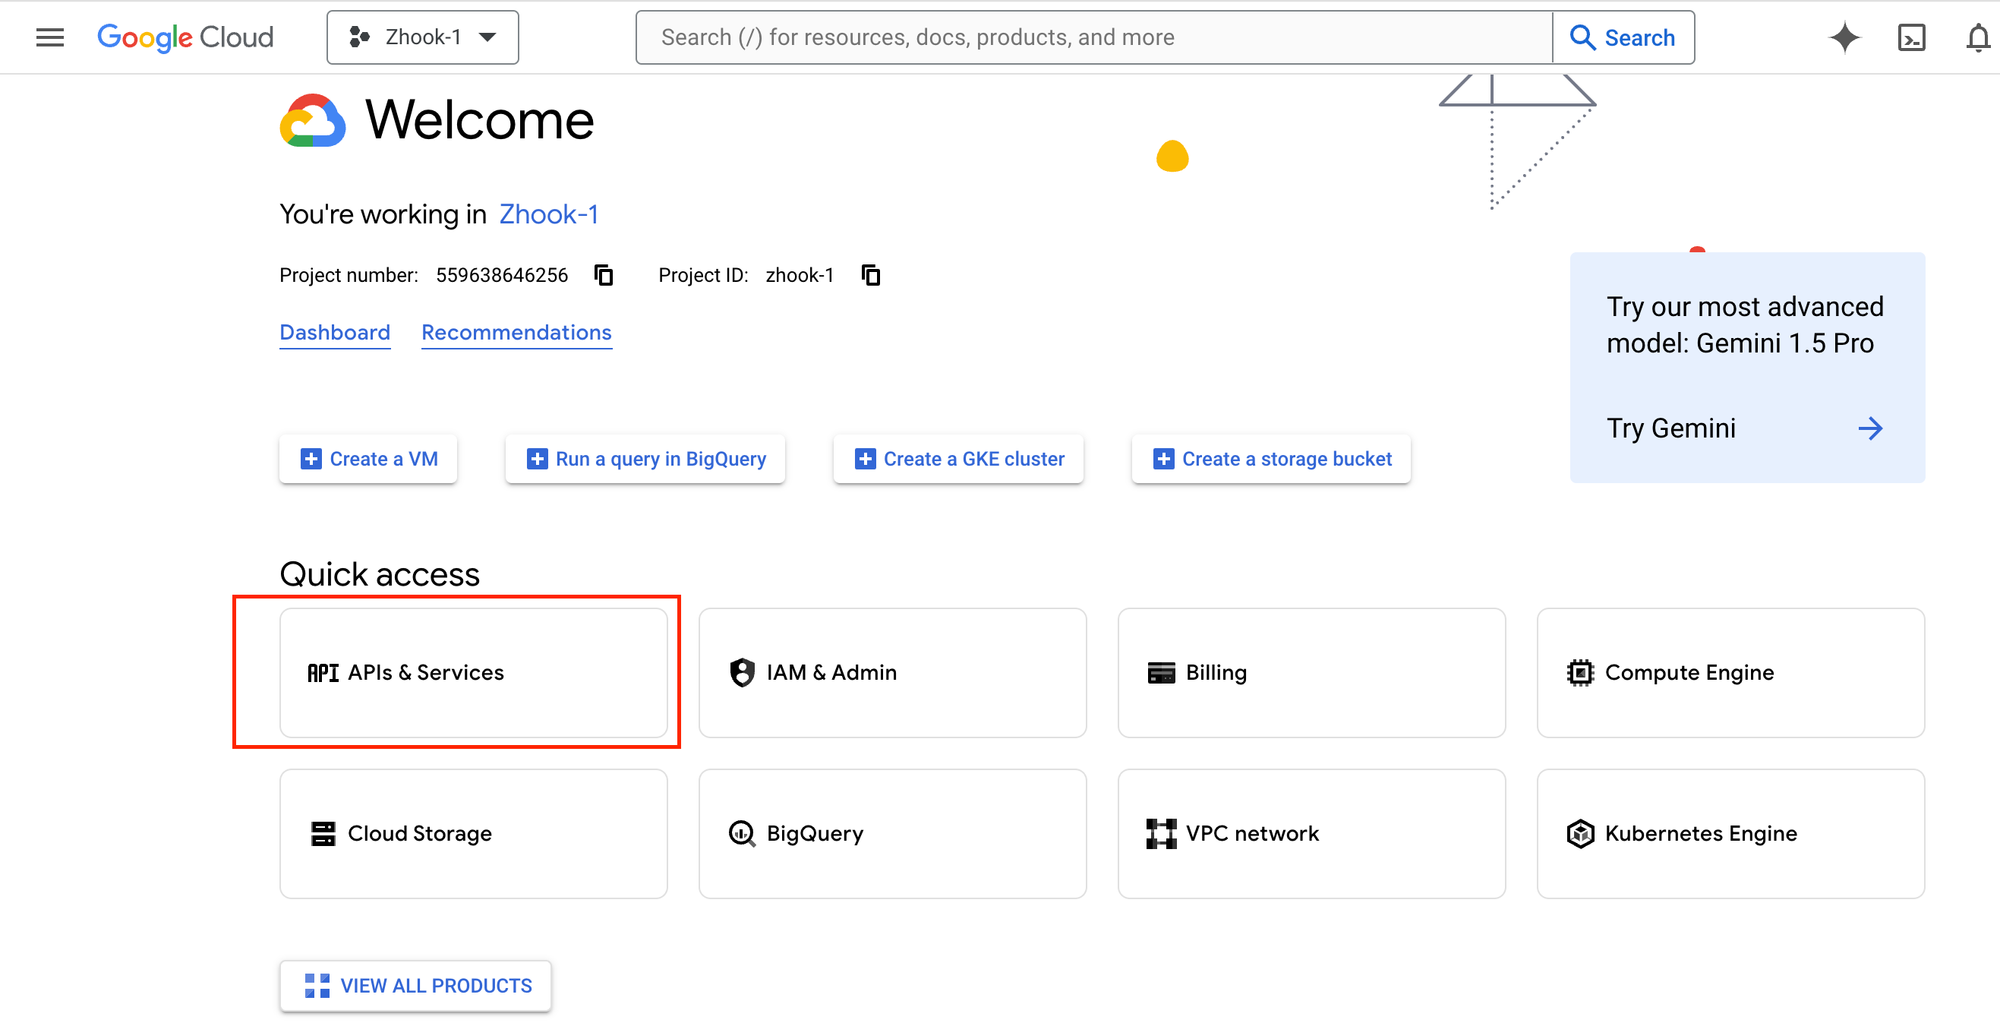
- After creating a project, you first need to select the newly created project, or if it's an existing project select it from the top of your screen. After choosing the project, you need to click on "API & Services" section to enable the required APIs for Indexing.
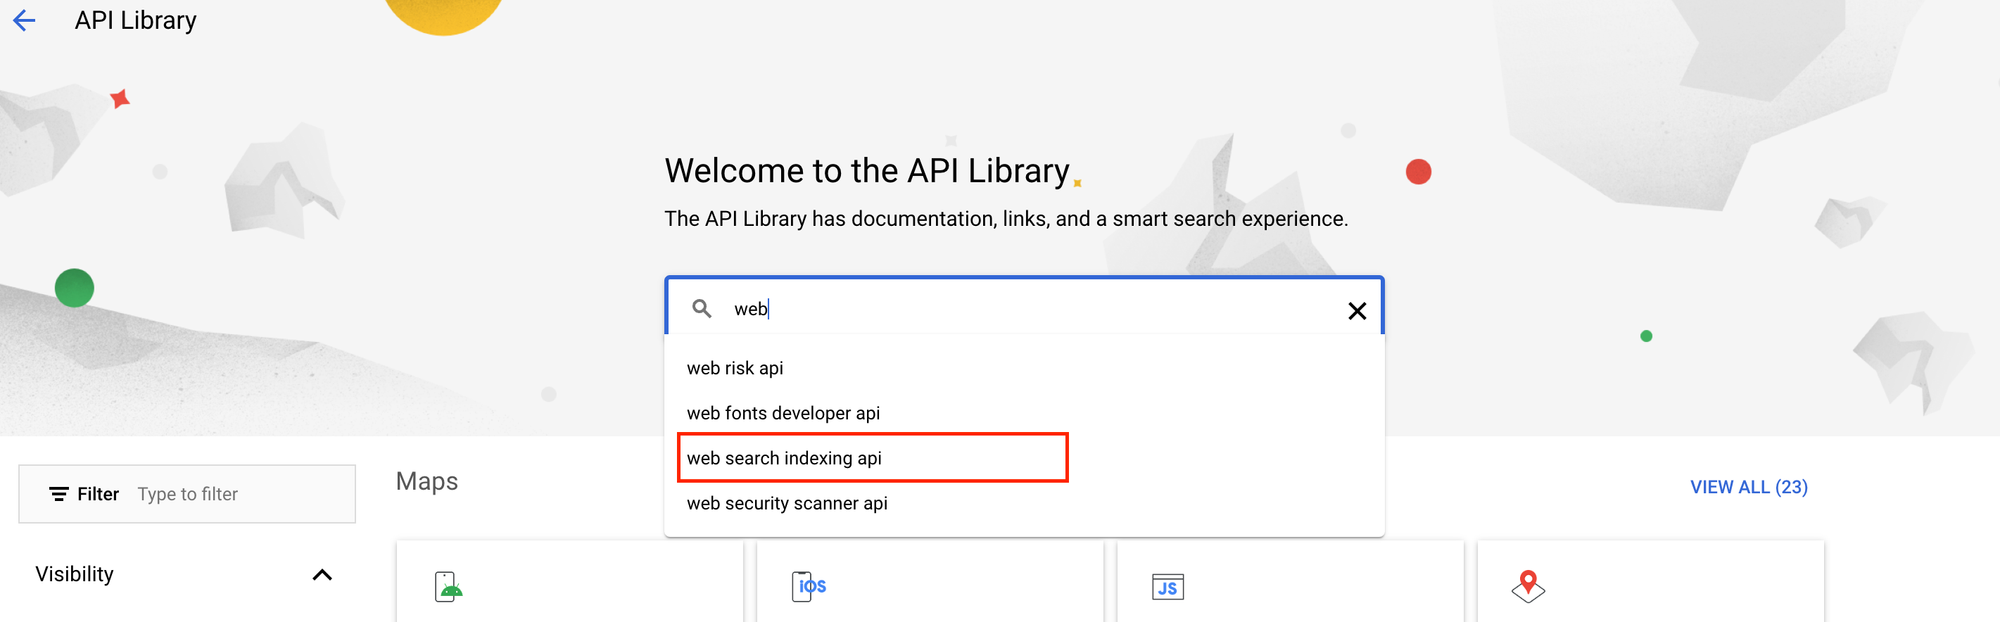
- On Clicking "API & Services" you will reach the "API Library" section. On this page, you can search for an API and enable it. From the search box at the top of the page, enter the name of the API in the search field, and select it in the drop-down list. We need two APIs enabled for your project -
- Web Search Indexing API
- Google Search Console API
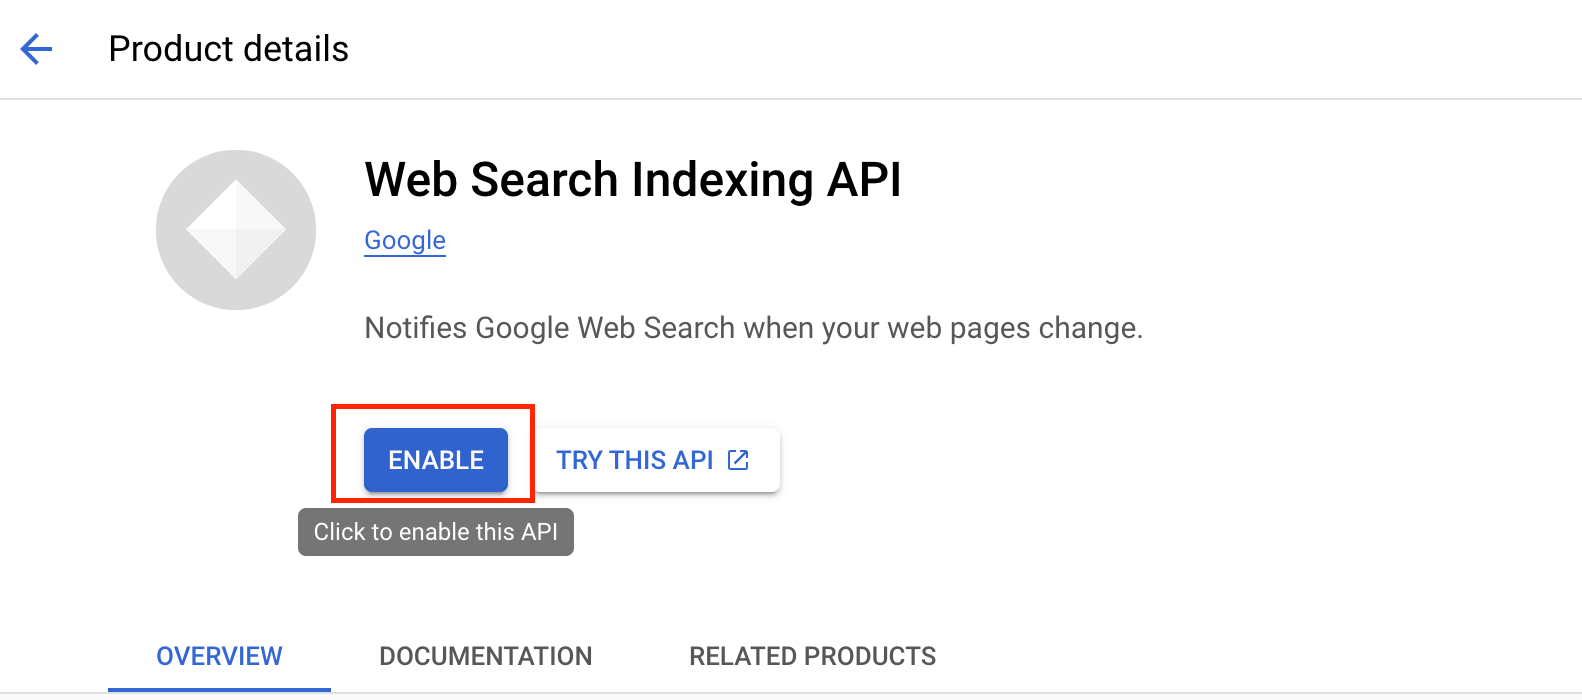
- To enable Indexing API, Search for "Websearch Indexing API" from the drop-down and select that API.
- Click the "Enable" button to enable the API for your project.
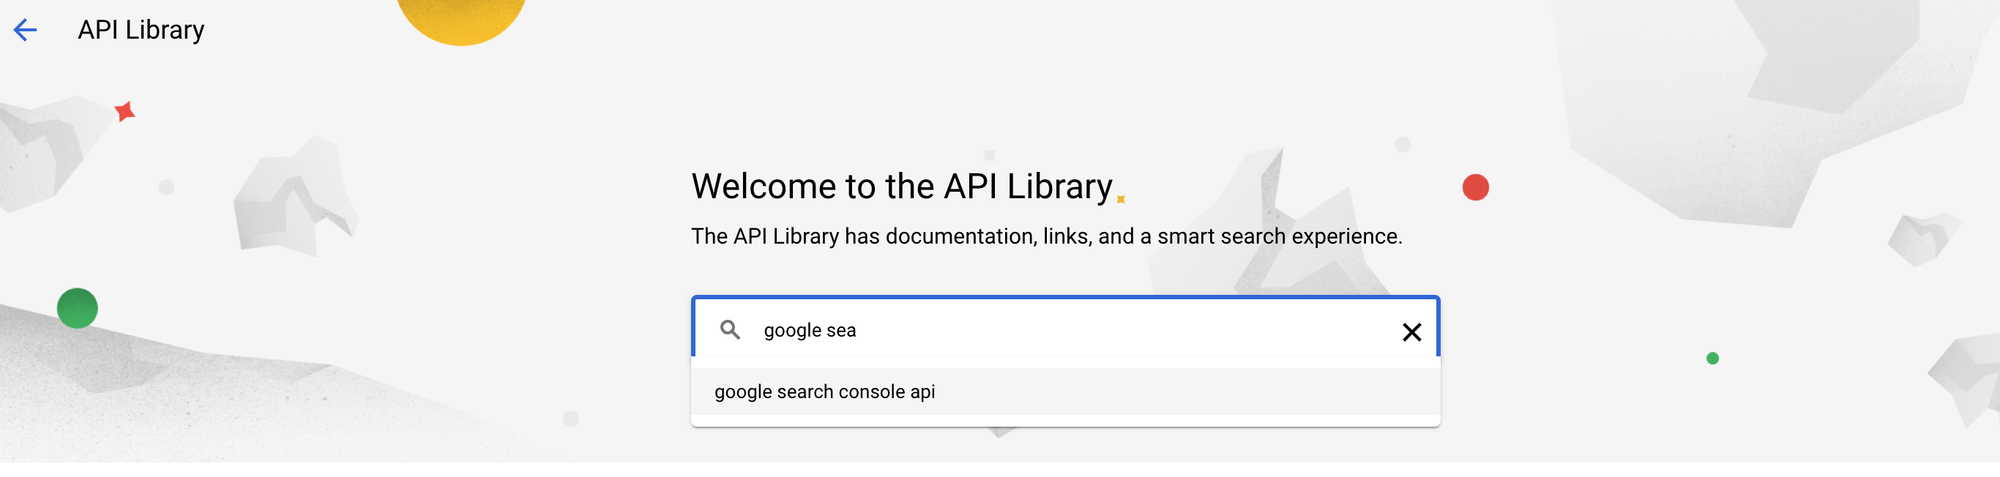
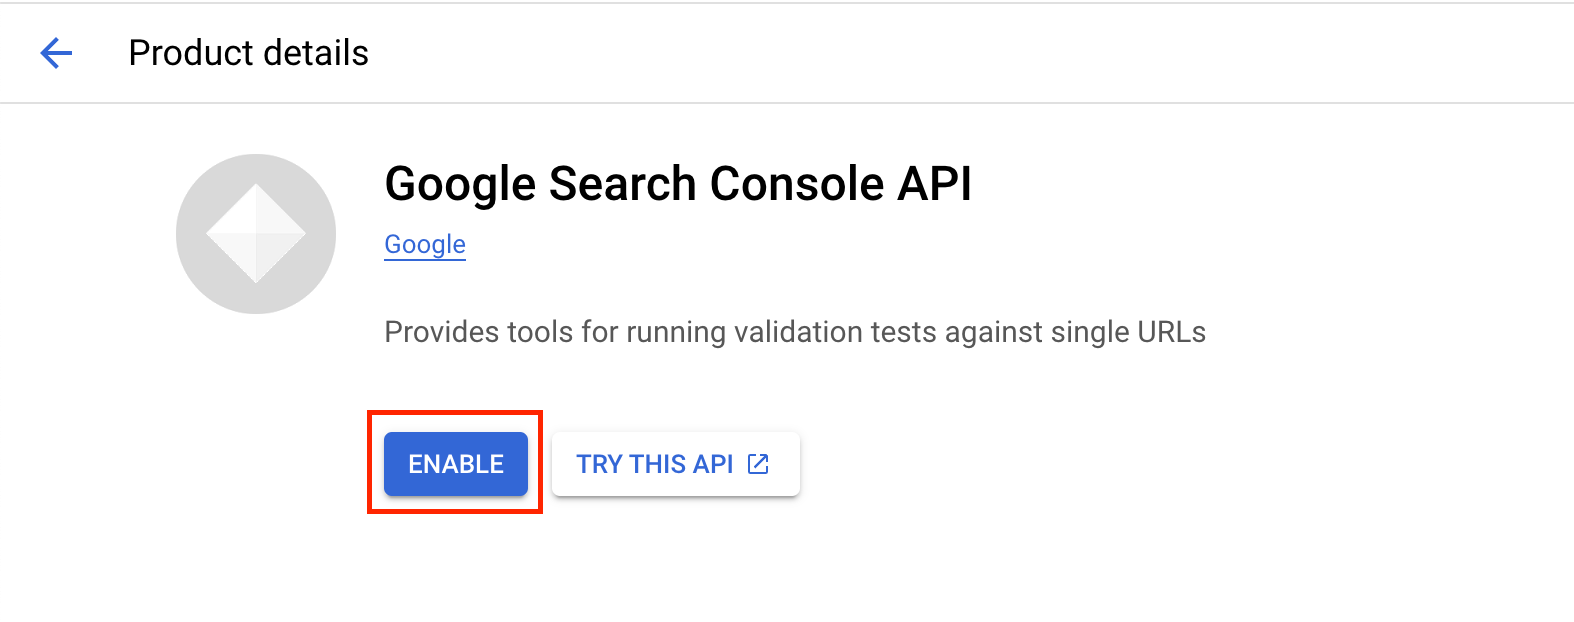
- To enable Search Console API, Search "Google Search Console API" and select from the drop-down options as shown in the screenshot below.
- Click Enable to activate the Google Search Console API for your project.
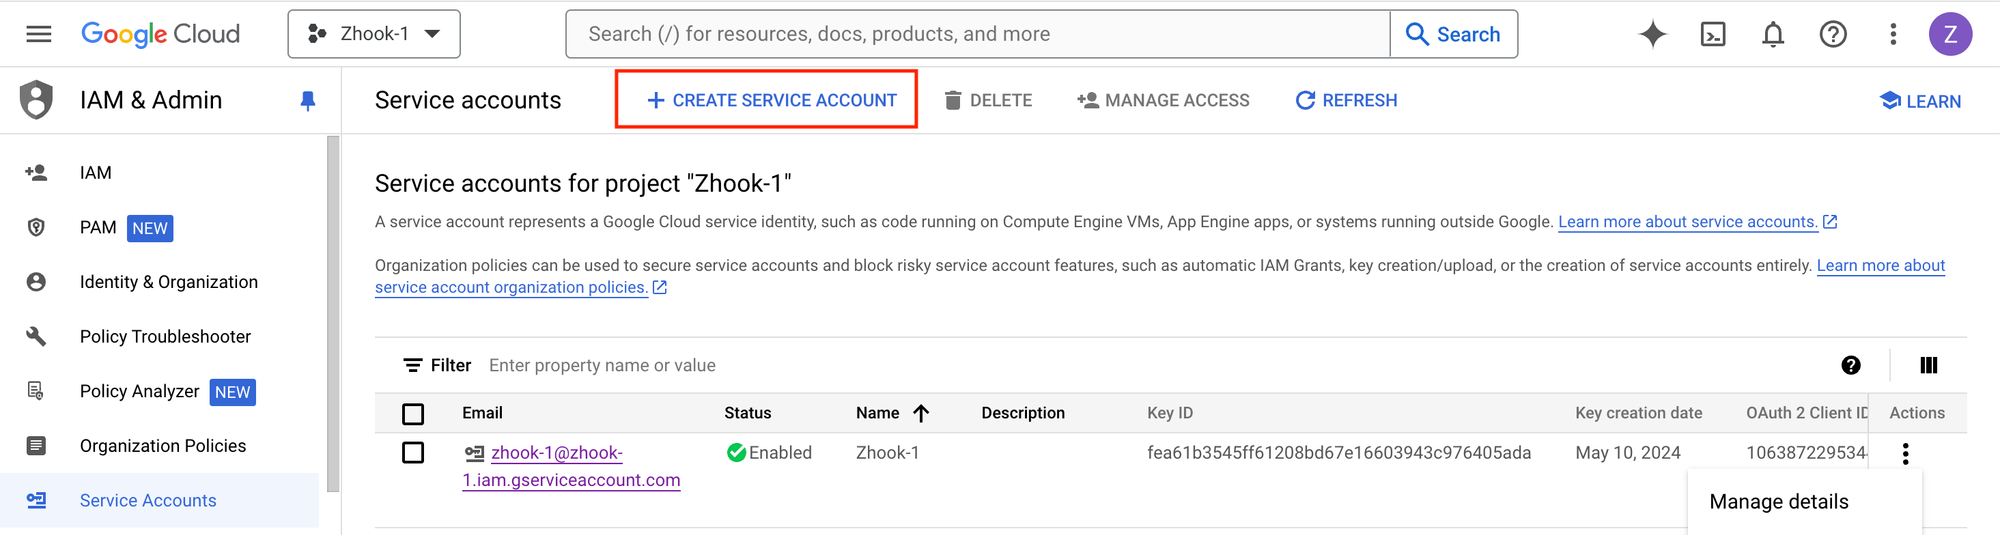
- After enabling the APIs in the selected project, you need to create a service account. To do so, go to the "IAM & Admin" section and then click on the "Service Accounts" as seen in the below screenshot.

- Click on "Create service account" to begin the process of creating a service account.
- Provide a name for your new service account and click "Create and continue". Note: Service Account Id is auto-populated by Google. Confirm with the "Done" button - the account should now be created.
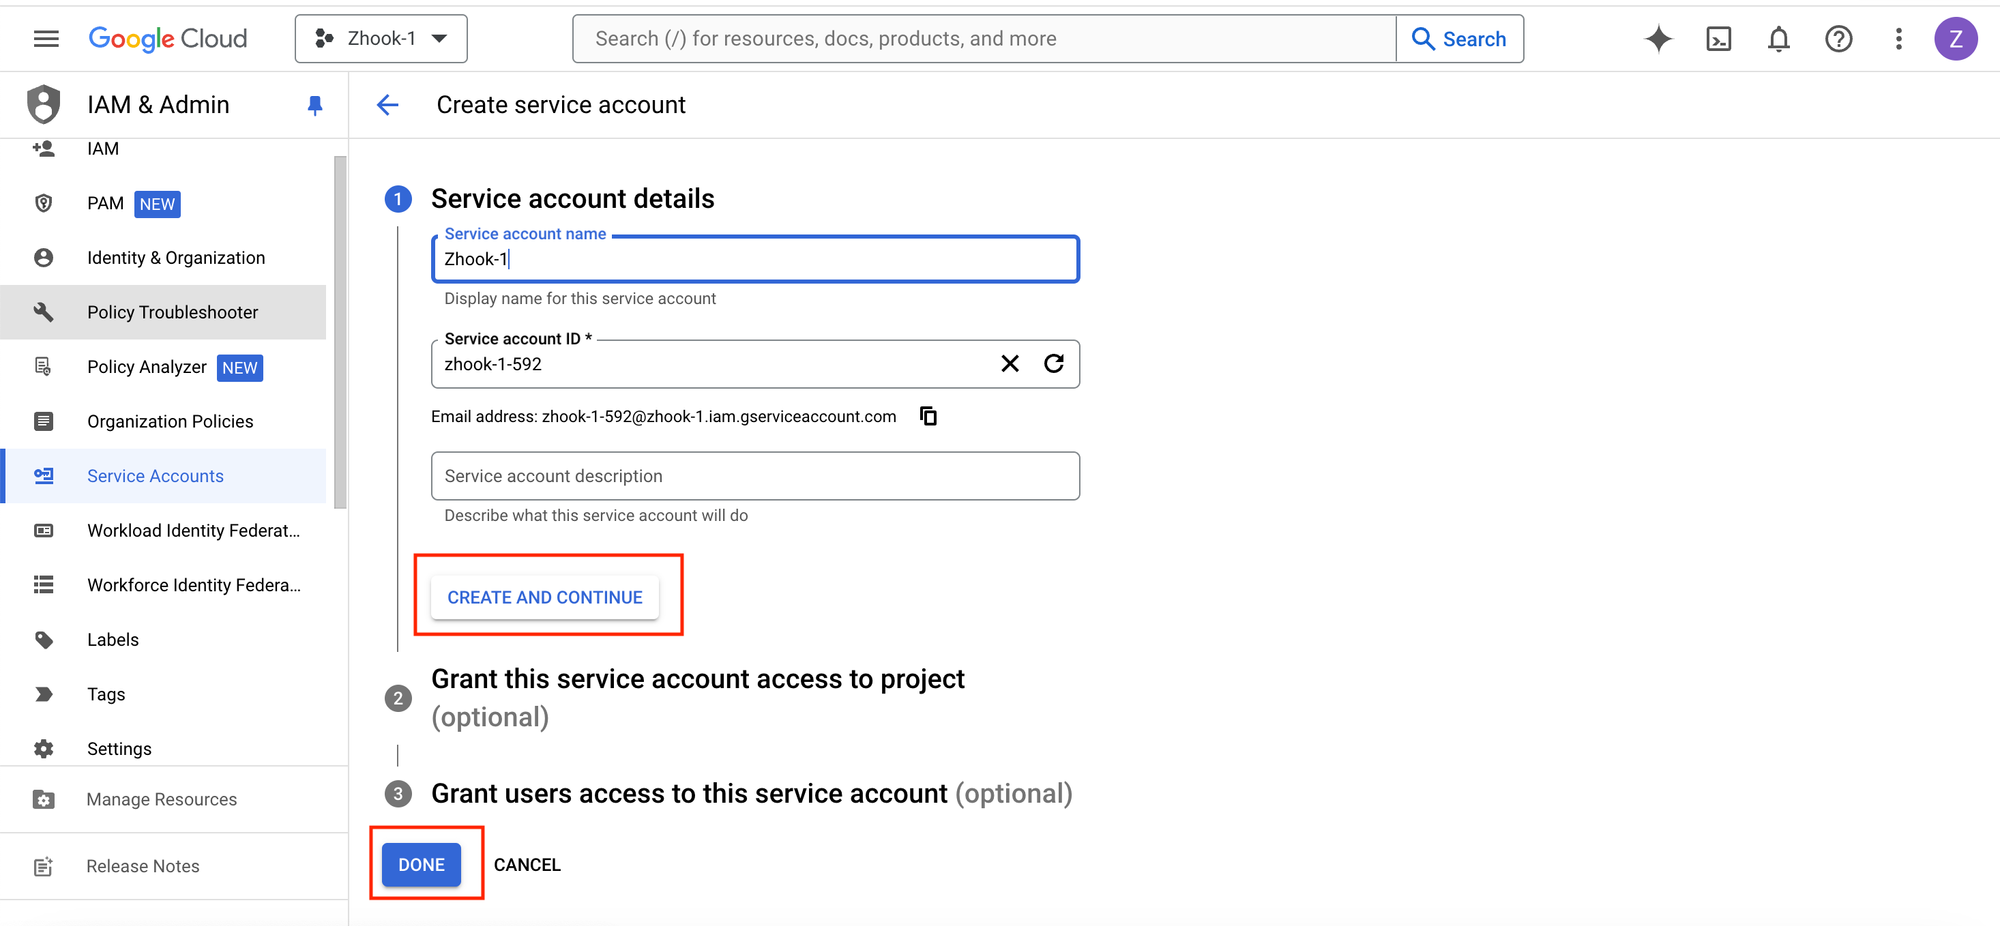
- Copy the service account before generating the JSON key, you will need it to add it to the Google search console.
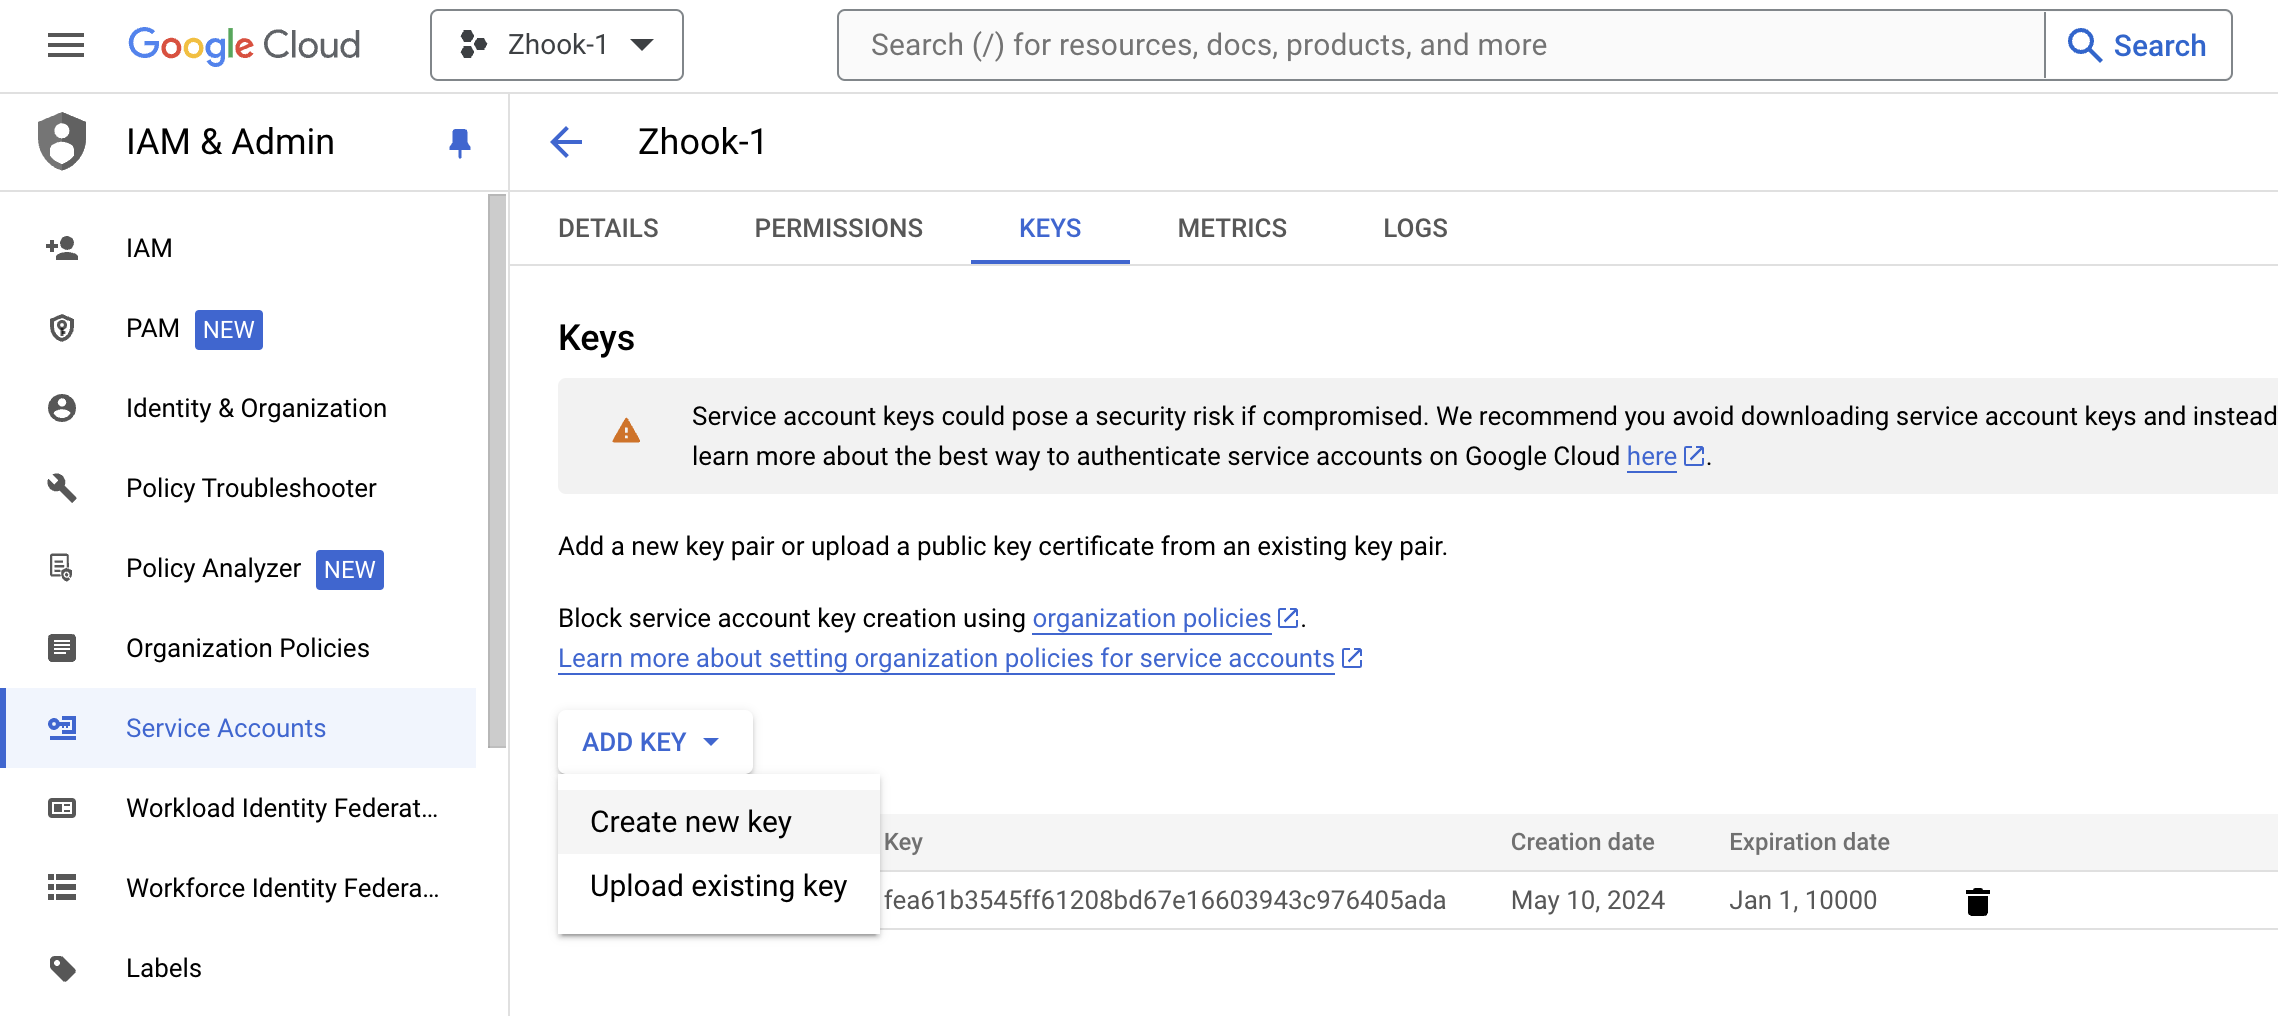
- Now browse to the "Credentials" tab and edit the newly created service account. Go to the "Keys" tab, press "Add key", then click on "Create new key".
- Select the Key type as "JSON" and press "Create". And you are done! 😃 The Google Service (JSON API) API key will get downloaded to the computer. Please make a note of where the key was downloaded.
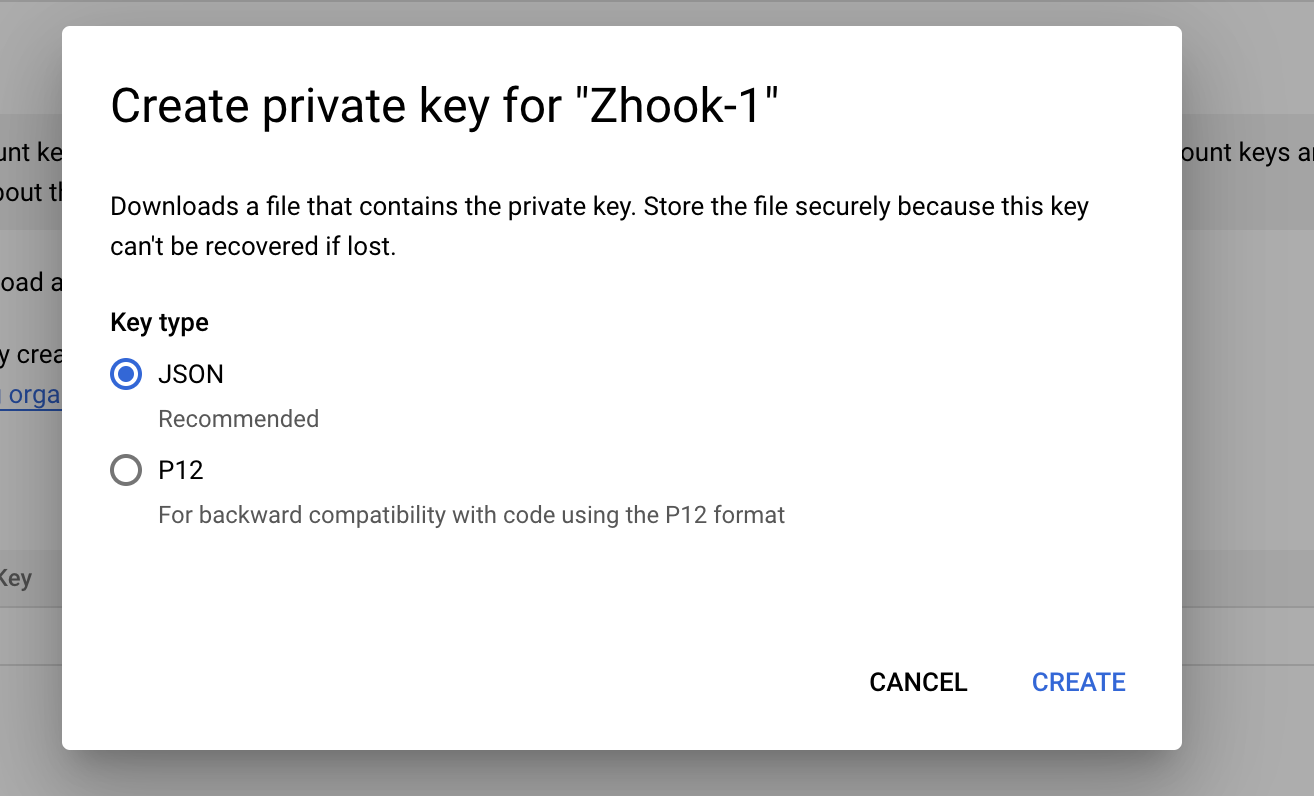
Also, note you can download the JSON API key only once.
That's it! There you go, you have your JSON API Key ready. Upload this to your Indexly account and you are ready to go! 😄
(3) Add Service key to Google Search Console
To enable indexing with Google in Indexly, you need to grant permission to Indexly interact with your site on Google Search Console. This is achieved by adding your Google Service Key Email address to your Google Search Console as Owner
- Go to Google Search Console and select your property
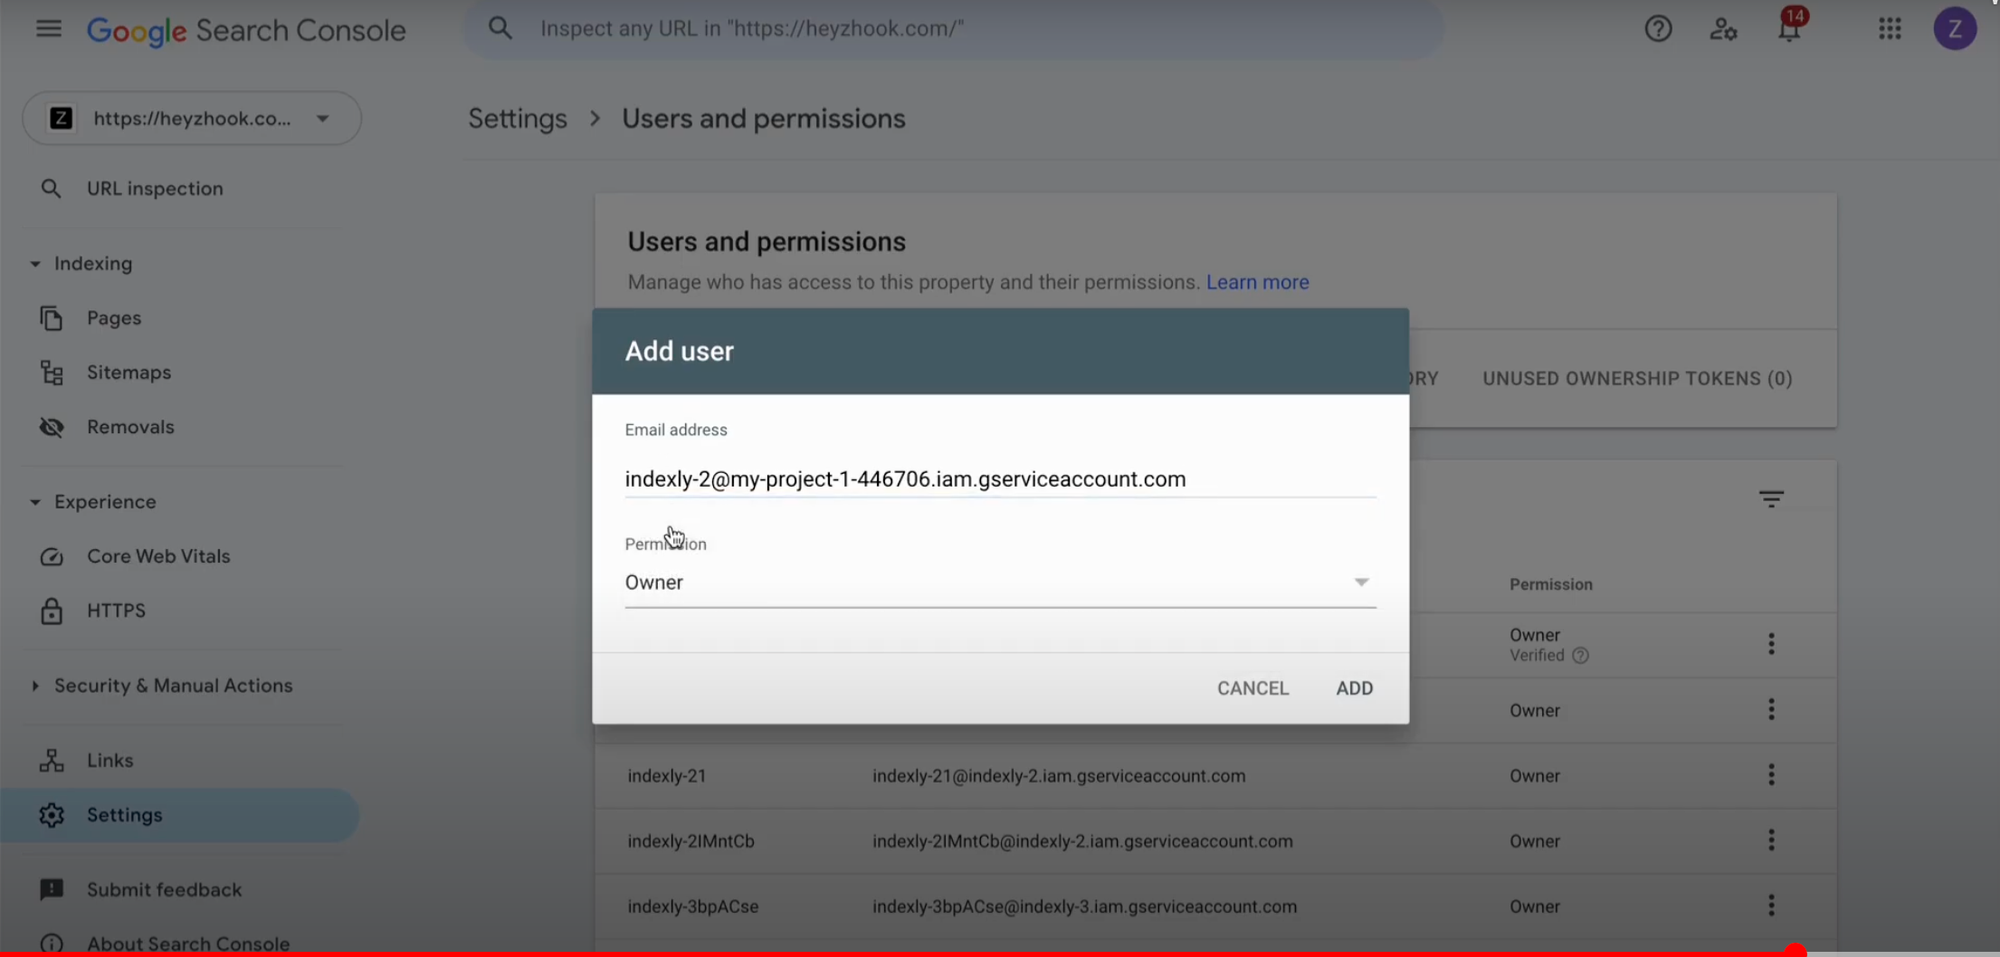
- Go to Settings > Users and permissions > Add user
- Paste the service email account you copied in step 2.13 above with the permission changing from "Full" to "Owner"
(4) Verify Google Service with Indexly
To enable indexing with Google in Indexly, once you have granted permission to Indexly to interact with your site on Google Search Console. You can now verify the service account with Indexly. Here's how to do it.
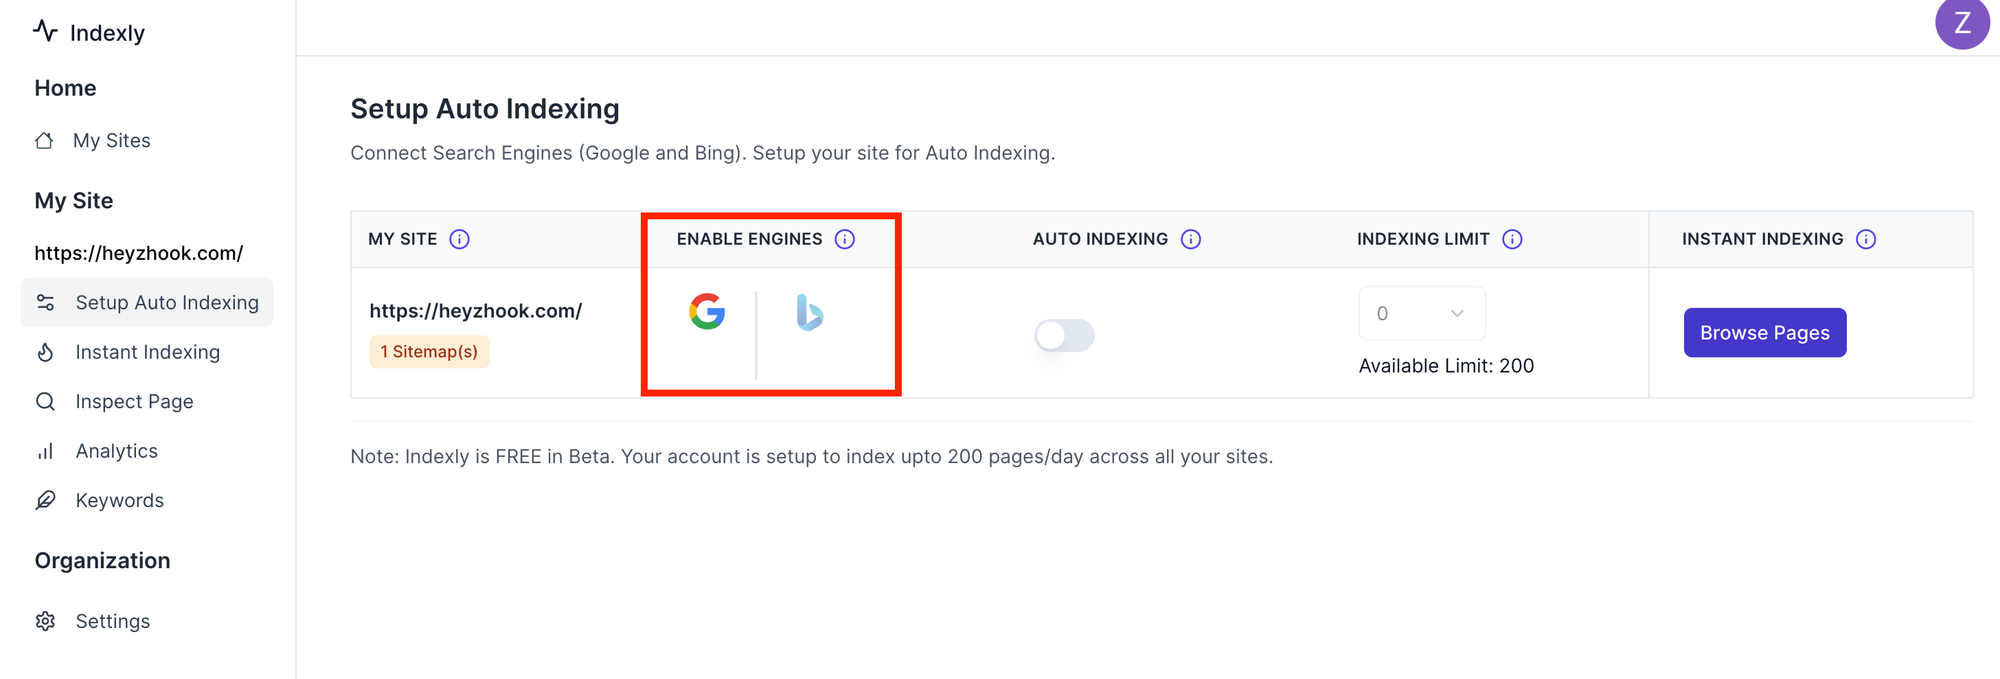
4a. Enable Google
In the Setup screen, under the Setup Search Engines section, click on the Google icon.
4b. Allow Indexly to access your Search Console
Copy the email address and click on Add to Google Search Console to copy the email address in your Search Console. Please Note: You need to add this email address to your console as Owner.
Toggle the Switch next to your site to enable it on Indexly. As you can see in the above screenshot, we have enabled the Indexly domain property. You will observe, Indexly syncs your sitemaps. This is to confirm all your sitemaps from the Google Search Console have been pulled in.
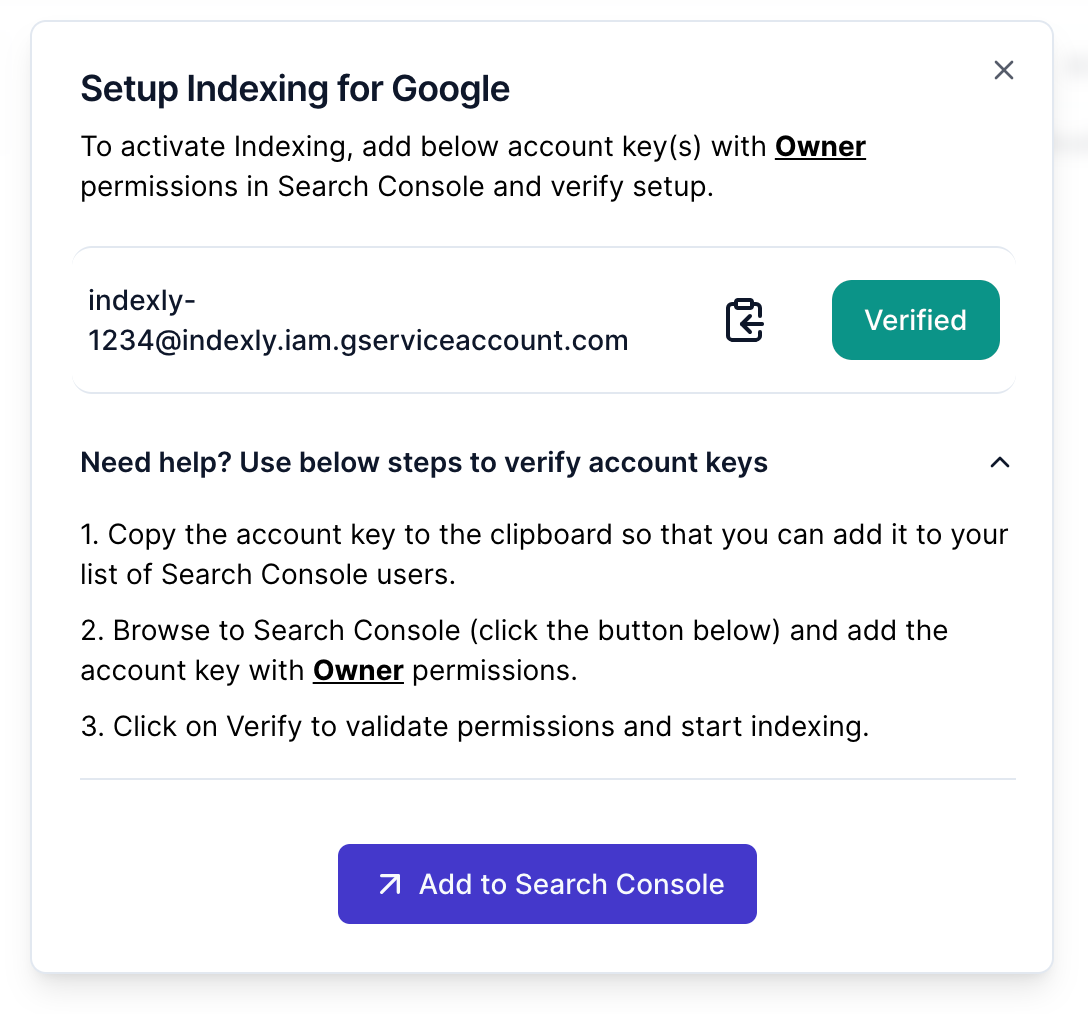
4c. Verify Access
By Clicking on Verify Setup, you will be able to confirm if you have added the Indexly email address with the correct permissions to your Google Search Console. If added correctly, you should get a confirmation screen on your Indexly account.
Well, that's it, you have now enabled your site to be indexed by Indexly.
Supercharge your SEO with Indexly
It usually takes a few weeks for Googlebot to crawl and index your website's pages. However, Indexly can simplify this process by automatically checking your sitemaps, finding new pages, and submitting them to Google Search Console.
This reduces human effort and errors and significantly reduces the time it takes to get indexed. When your website's pages are indexed, they rank higher on search engines, ultimately boosting organic traffic.